- Support Knowledgebase
- Install the AdobePS printer driver to create PostScript and printer files in Windows applications
- Универсальный драйвер принтера HP
- Установка «устаревших» принтеров на windows 10
- How to install a virtual PostScript printer in Windows
- Introduction
- Installing Generic PostScript Drivers in Windows
- Setting up virtual PostScript printer
- Printing files to PostScript format (.ps)
- Related software and links:
Support Knowledgebase
Install the AdobePS printer driver to create PostScript and printer files in Windows applications
Create a PostScript or printer file
The Adobe PostScript printer driver (AdobePS) lets you to create PostScript files (PS), or printer files (PRN) from any Windows application that prints. (No printer required.) You can then open these files in Adobe Acrobat Distiller 5.0 or later to convert them to PDF files. AdobePS is available from the Adobe website at www.adobe.com/support/downloads/#Printer : Download Adobe Universal PostScript Windows Driver Installer 1.0.6 — [language].
Note: Installing the AdobePS printer driver on 64-bit systems (such as Windows XP x64) is not supported.
When you install AdobePS, specify the Acrobat Distiller PostScript Printer Description (PPD) file. This PPD file adds advanced options to AdobePS, such as color and custom page sizes. (Selecting another PPD file may result in PDF files that contain incorrect color, font, or page size information.) The Acrobat Distiller PPD is installed with Adobe Acrobat, and is available from the Adobe website.
To download the Acrobat Distiller 5.0 PPD file (Adist5.ppd):
2. In the PostScript Printer Drivers area, click Windows.
3. Scroll to the PPD Files area, and then click PPD Files: Adobe.
4. Click Download, and then click Download again to save the Adobe.zip file to your hard disk.
5. Use WinZip or another utility to decompress the Adobe.zip file.
The following procedure requires the Acrobat Distiller PPD file.
1. Double-click the Adobe Universal PostScript Windows Driver Installer (winsteng.exe), and then click Next.
2. Click Accept to accept the End User License Agreement.
3. If the Printer Installation Type dialog box appears, select Install A New PostScript Printer, and then click Next.
4. In the Printer Connection Type dialog box, select the Local Printer option, and then click Next.
5. In the Local Port Selection dialog box, choose one of the following, and then click Next:
— File: Local Port
— File: Creates A File On Disk
6. In the Select Printer Model dialog box, click Browse.
7. Select the Acrobat Distiller PPD file that you downloaded (Adist5.ppd) or select the PPD file that Acrobat installed to the following location, and then click OK:
Note: The following PPD files may appear under different names in the AdobePS installer wizard until selected (for example, «Acrobat Distiller» for Adist5.ppd, or «Adobe PDF 7.0» for Adpdf7.ppd.)
— Acrobat 7.0.x: Program Files\Adobe\Acrobat 7.0\Distillr\Xtras\Adpdf7.ppd
— Acrobat 6.0.x: Program Files\Adobe\Acrobat 6.0\Distillr\Xtras\Adpdf6.ppd
— Acrobat 5.x: Program Files\Adobe\Acrobat 5.0\Distillr\Xtras\Adist5.ppd
9. Select Not Shared, and then click Next.
10. Name the AdobePS printer, select No to printing a test page, select your preference for a default printer, and then click Next.
11. Click Install.
12. In the Printer Configuration dialog box, select No, and then click Next.
13. Click Finish, and then restart the computer if prompted. (A new printer icon appears in the list of printers.)
Create a PostScript or printer file
After you install AdobePS, you can create a PS or PRN file.
1. Choose File > Print.
2. Choose the AdobePS printer from the list of printers.
3. Select Print To File, and then click Print or OK.
Универсальный драйвер принтера HP
| Тип |  Windows Windows | Bit |  |  |  |  |  |
| PCL6 | 10 — 7 / 2019 — 2008 | 32 | 08.09.2020 |  | 7.0.0.24832 | 17.4 [MB] | Скачать |
| 64 | 08.09.2020 | | 7.0.0.24832 | 19.4 [MB] | Скачать | ||
| PostScript | 10 — 7 / 2019 — 2008 | 32 | 08.09.2020 | | 7.0.0.24832 | 18.6 [MB] | Скачать |
| 64 | 08.09.2020 | | 7.0.0.24832 | 20.5 [MB] | Скачать | ||
| USB (DOT4) | 10 — 8 / 2012 | 32 | 21.04.2015 | | 7.0.0.29 | 1.0 [MB] | Скачать |
| 64 | 21.04.2015 | | 7.0.0.29 | 1.5 [MB] | Скачать |
Лицензия HP — принимаем если хотим использовать драйверы.
В сайдбаре уже определена разрядность вашей системы.
Универсальный драйвер принтера HP под Windows 10 — 7 / 2019 — 2008 на русском и английском языках.
HP Print and Scan Doctor — диагностика и реанимация вашего принтера.
Установка «устаревших» принтеров на windows 10
Источник фото Canon i-SENSYS MF3220 : Яндекс.Картинки
Все, кто имеет операционную систему windows 10 , сталкивались с такой проблемой, как установить на нее драйвера «древних» принтеров, мфу.
Сегодня я расскажу на примере Canon i-SENSYS MF3220.
Вся загвоздка в том, что, скачав с официального русскоязычного сайта Canon.ru самораспаковывающийся архив с драйверами МФУ, там я не нашел установочного и исполняемого файлов — нет обычного setup.exe/install.msi и т.п. Того самого файла, который бы запустил установочник и облегчил мне установку драйверов.
Распаковав архив в одноименную папку, я зашел туда и увидел там кучу файлов и только несколько, связанных с установкой — файлы с типом «Сведения для установки» ( .inf ).
Для того, чтобы установить драйвера только имея файлы .inf , несколько путей:
- диспетчер устройств;
- установка или добавление принтера.
Так как я сегодня остановил выбор свой на определенном МФУ, то и буду рассказывать как я устанавливал его. Почему именно его? Потому, что при его установки я использовал оба способа, чтобы полноценно установить все поддерживаемые его функции — печати и сканера.
Через диспетчер устройств я установил драйвера только для сканирования:
1) в поиске набрал «диспетчер устройств» ;
2) в диспетчере у меня высветился «неизвестное устройство — MF 3220» ;
3) кликнув правой кнопкой мыши, выбрал в контекстном меню «обновить драйвера. «
4) вышло окно с обновление драйверов и там я последовательно выбирал такие пункты:
- Выполнить поиск драйверов на этом компьютере;
- Искать драйвера в следующем месте: Обзор (не забудьте установить флажок на том, что искать нужно включая вложенные папки )
После поиска в папке драйверами, он устанавливает драйвер сканирования для МФУ. Он появится в диспетчере устройств в пункте — «Устройство обработки изображений».
На этом работа с диспетчером устройств закончилась. И больше неопределенных устройств не было.
После этого остался только один способ установить драйвер печати для МФУ через «Устройства и принтеры».
Так же через поиск windows я нашел его. Войдя в устройства и принтеры у меня отобразился только сканер с названием МФУ и больше ничего. Через кнопку » установка или добавление принтера» запустился поиск подключенных принтеров, но я не стал дожидаться того, что он выдаст мне отрицательный результат, и я стал следовать таким пунктам:
- Выбрал пункт — Нужный принтер отсутствует в списке;
- Далее выбрал «Добавить локальный или сетевой принтер с параметрами, заданными вручную»;
- Далее я выбрал пункт — Использовать существующий порт и в выпадающем списке выбрал «USB001 (Порт виртуального принтера для USB)»;
- Далее в таблице в столбце «Изготовитель» выбрал Canon, а в столбце «Принтеры» просмотрел список и не нашел своего принтера, нажал на кнопку «Установить с диска»;
- Далее я выбрал папку с разархивированными драйверами и там выбрал файл MF3200AR.inf и нажал кнопку OK.
- После этого началась установка драйверов для принтера.
Дождавшись установки, я выбрал принтер по умолчанию и проверил печать, распечатав любой документ или картинку.
По такому же принципу я часто устанавливаю принтеры, которые, в принципе вполне еще работают, но или же не имеют доступных драйверов для соответствующей операционной системы, или же после установки драйверов «не хотят» печатать.
Всех, прочитавших статью, благодарю за потраченное время, надеясь, что была она полезной))
How to install a virtual PostScript printer in Windows
Using universal PS drivers to install virtual printer in latest Windows
How to install a virtual PostScript printer in Windows
Introduction
Since 90’s, Adobe has provided a free PostScript driver for users to download, so they can install a PS printer to their systems. This policy changed and the original driver (found as winsteng.exe) has not not worked since Windows Vista.
It was originally written for the earliest Windows and later upgraded to Windows 2000, but there is no way how making it work on later versions of Windows, especially on the 64-bits.
Considering how many users are looking for «some file» to PostScript conversion on our website (like PDF to PS), we have decided to make a little tutorial about installing virtual PS printers, because it is one of the easiest ways how PostScript files can be created from something via the Print (to file) function.
If you do not have access to a physical PostScript printer and thus you get no drivers from the vendors, there exist really only a few limited options left on how you could install a virtual PostScript printer to your system. Whilst experienced users can probably deal with this problem on their own, the less savvy computer user might have trouble solving this problem on their own.
This article will cover one of these ways, and we will show you how you can install virtual PS printer to Windows 8. This will of course work on previous Windows Vista or Windows 7 or latest Windows 10, you would just need to download different driver.
Installing Generic PostScript Drivers in Windows
Some manufacturers, like Xerox, provide a generic PS driver that you can install to your system. You can find them here: Xerox Printer Driver Download
When you go that website, it will automatically detect your OS and offer you several files for download. The file of interest we are looking for is in section PostScript, called PostScript Driver. The page looks like this in our test Windows 8.1. 32-bit OS.
However, Xerox offers drivers for the following Windows editions: Windows XP, Windows Vista, Windows Server 2003, Window Server 2012, Windows 7, Windows 8, Windows 8.1 and also latest Windows 10. In both 32-bit and 64-bit variants.
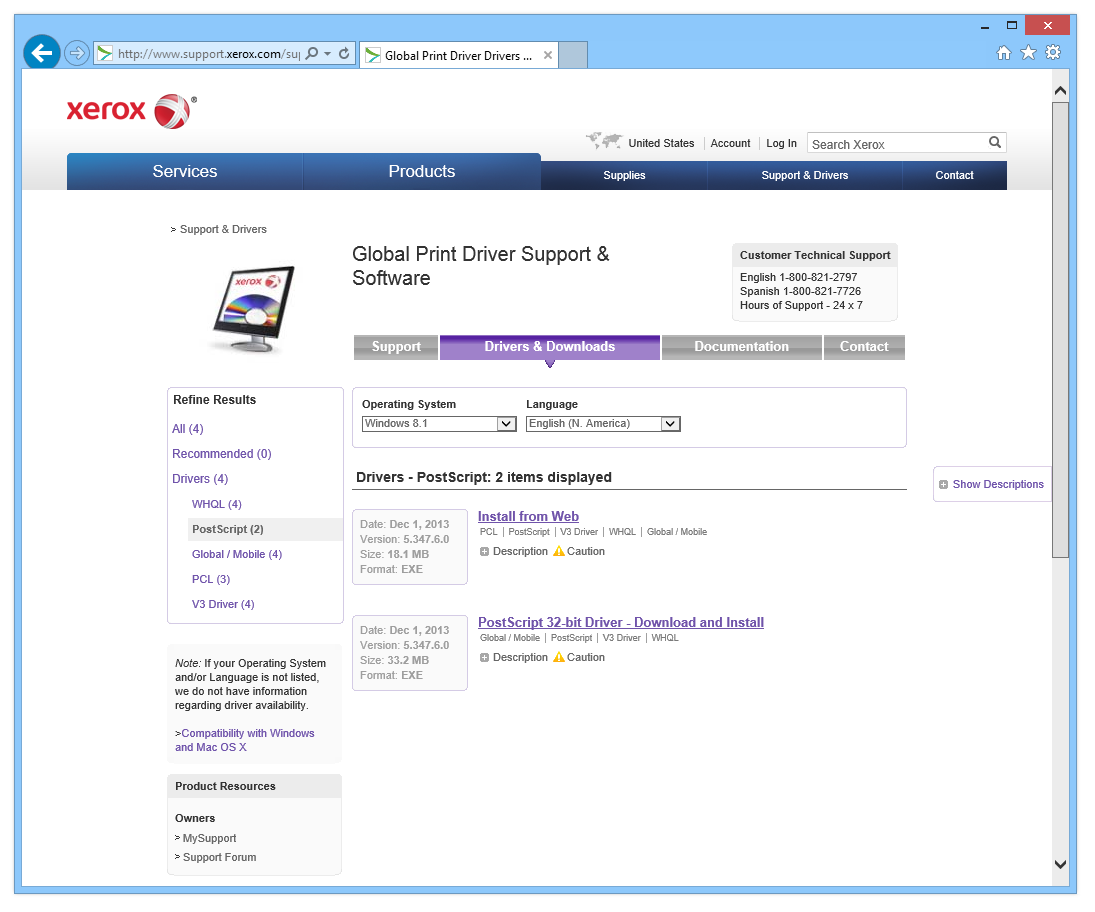
Xerox Support and Driver download website
Download the PostScript driver file in your OS version and install it.
Setting up virtual PostScript printer
After the first installation part a printer setup process starts. At first the system will look for physical printers. It doesn’t matter to us, because we want to install a virtual one. Once the procedure is finished, click on the «The printer that I want isn’t listed» link.
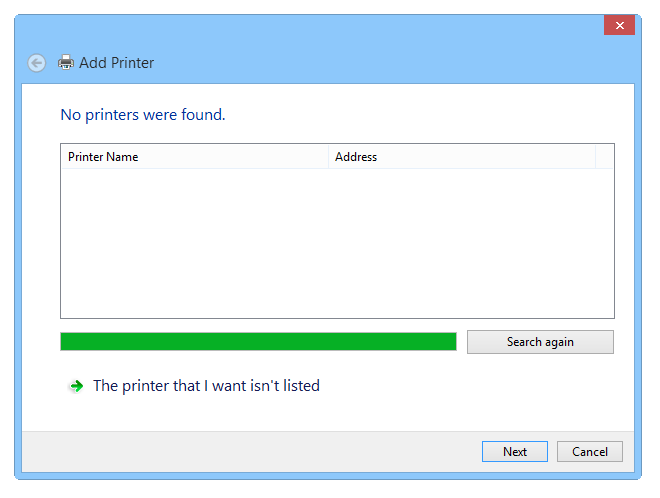 Printer setup looking for existing printers
Now we are going to add a new printer. Select the «Add a local printer or network printer with manual settings function».
In Windows 7, the windows look a little different and the system ask you whenever you want to install local or network printer. Pick whatever choice you need. The next steps are basically the same, the windows and some wording might be different, but the key principle is the same.
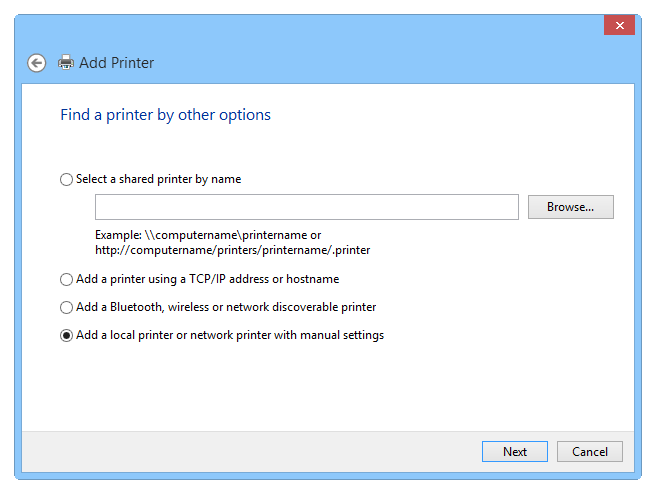
Adding local or network printer in Windows 8
In the next step, select the «FILE: (Print to File)» option in the existing port settings. This will create *.ps files whenever you use this virtual printer for printing your files.
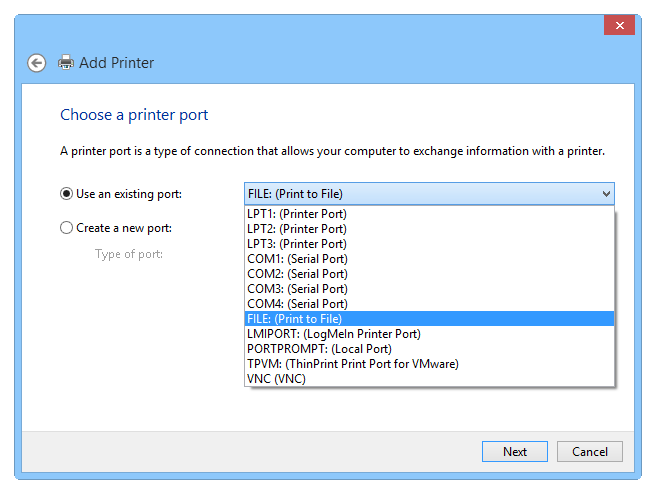
Selecting Print to File option instead regular port for printer
The setup will now give you a choice of the few drivers to select from. We didn’t see much difference in them, so picked the first one.
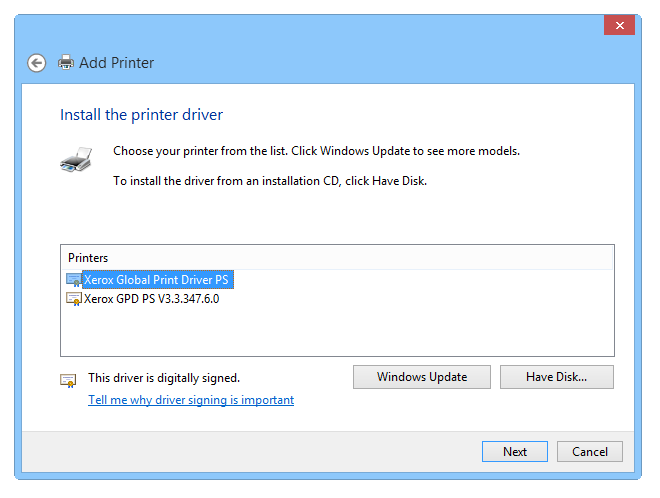
Picking up a driver for virtual PostScript printer
Name your virtual printer as you seem fit, this will be the name visible in printer selection and in the Devices and Printers control panel.
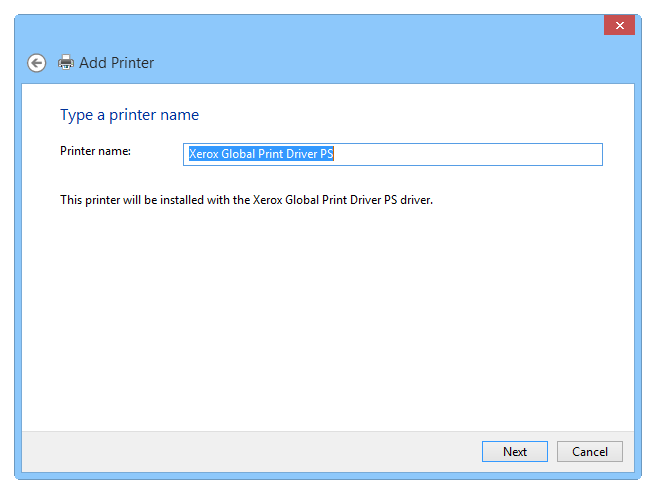
Naming newly installed virtual PS printer
If everything goes fine without error, you should see this and wait till it’s finished.
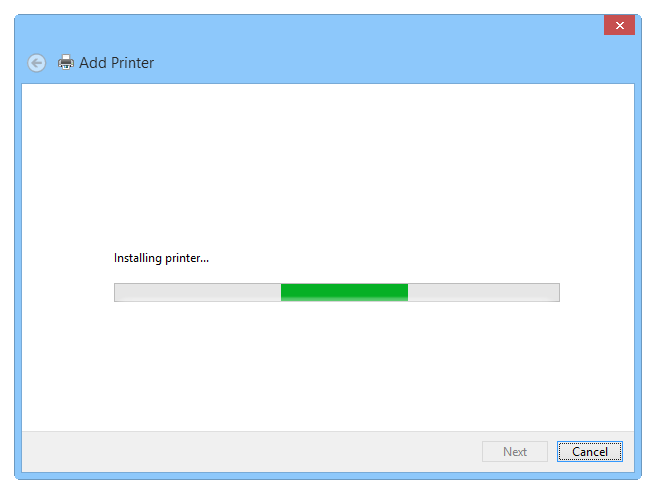
Final setup progress of the installation procedure
After the setup procedure is finished, the system asks you whenever you want to share this printer in your network. The choice is yours, we didn’t want to share it, so picked the first option.
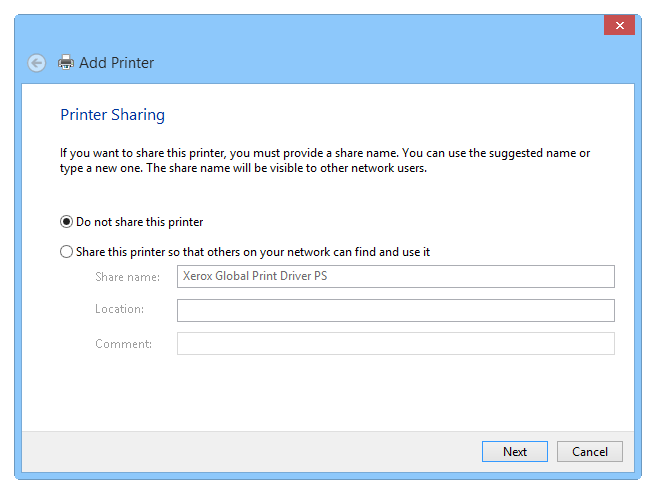
Setting up printer sharing options
This is the final window of the virtual PS printer setup procedure. Now you can pick if you want the new virtual printer to be your default.
Better uncheck this option, if you are regular user and won’t use PostScript files in everyday business.
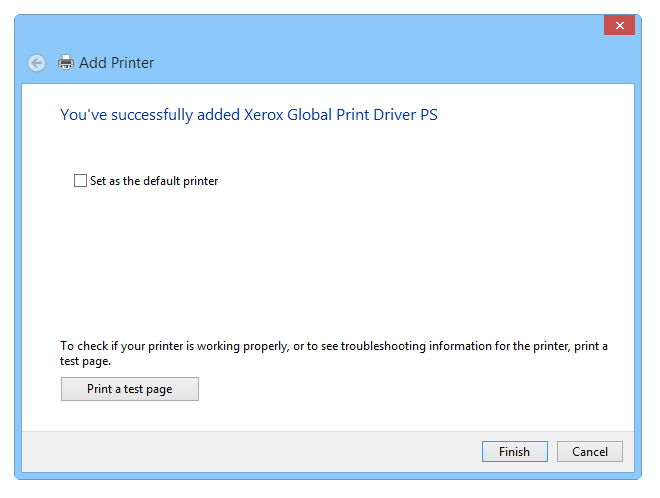
Finishing up the printer adding procedure
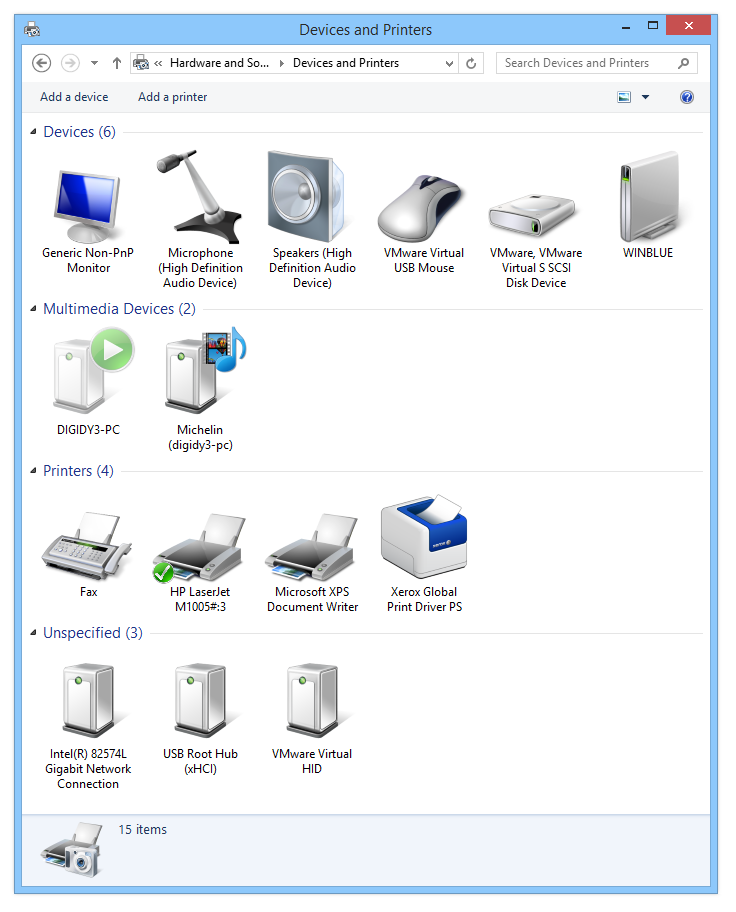
If everything went smooth and without problems, you should see your new printer in the Devices and Printers control panel, listed under the name you have saved few steps before.
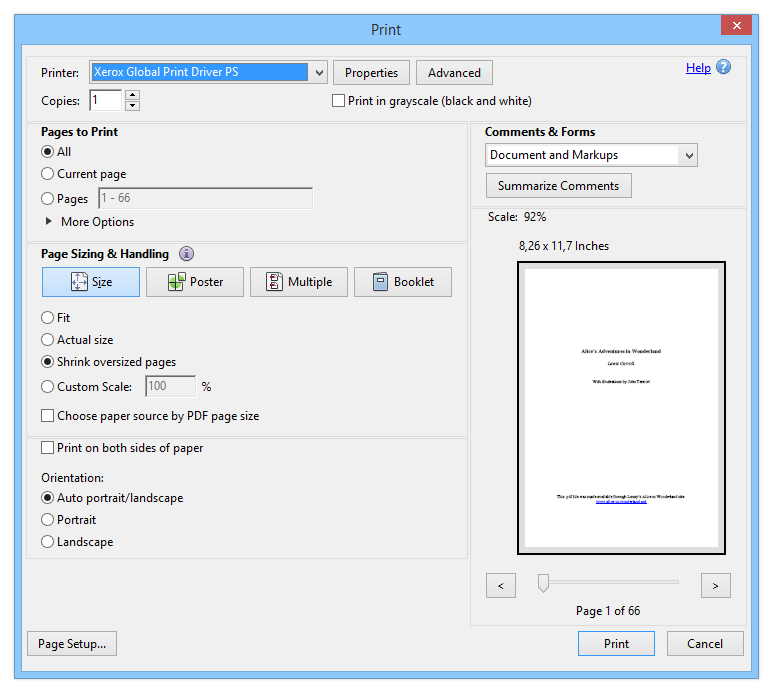
Printing files to PostScript format (.ps)
Now you should have the option to select this new virtual PostScript printer whenever you use the default File ► Print function in some program. We have tested it on a random PDF and it worked just fine.
And that’s it for this guide. We hope it will help you to solve your PostScript troubles in Windows.
Although this article was originally written when Windows 8.1 were the latest, it is still applicable for the latest Windows 10. You just have to pick drivers for Windows 10 instead Windows 8 that are shown on the screenshots.


