- Sims4Studio releases a new tool to Batch Fix CC Doors and Windows
- [FIXED] Doors windows and arches clipping in mirror reflections
- Windows and doors reflections are not working in mirror
- Re: [OPEN] Doors windows and arches clipping in mirror reflections
- Re: [NEEDS INPUT] Doors windows and arches clipping in mirror reflections
- Re: [NEEDS INPUT] Doors windows and arches clipping in mirror reflections
- How to Fix Doors and Windows in Wall Openings?
- 1. Fixing Doors and Windows with Lugs
- 2. Fixing with Screws and Plugs
- 3. Fixing in Wood Work Opening
- 4. Fixing in Steel Work Opening
- 5. Fixing of Composite Units
- Precautions for Fixing Doors and Windows
- FIX DOORS AND WINDOWS
- More from this Author
- Severinka_
- More from this Author
Sims4Studio releases a new tool to Batch Fix CC Doors and Windows
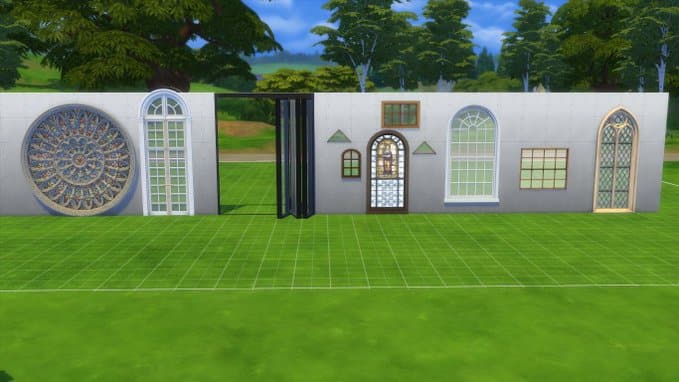
Ever since the release of The Sims 4’s update during the release of Star Wars Game Pack people have reported visual clipping issues with Custom Content Doors and Windows. The issue basically persisted for all CC Doors and Windows that were made public before the release of the latest patch. Some of the CC creators even had to go through their entire catalog of custom Doors and Windows to fix this visual glitch. However, the solution to batch fix all of this has just been released by the talented folks behind Sims4Studio!
The latest Sims4Studio update now has an option to Batch-Fix the entire catalog of your CC Doors and Windows that you have in your Mods folder. This tool will automatically fix all that CC content without having to redownload the updated versions that CC creators might’ve released.
The new version of Sims4Studio is now live and can be downloaded HERE! Check out what the tool creators had to say about their recent update:
Hi all, Studio is updating today with a batch fix for custom windows and doors that were broken by the Star Wars patch. The Windows and Mac versions both have this new feature.

For creators, each version also has a feature that allows you to fix the cutout on any new creation by clicking Tools/Modding/Generate Model Cutout From Wall Cutout Texture after you’re finished importing your new wall cutout texture.
For everyone, please read the notes below.
Select your version of Studio to download HERE
When the batch fix runs, it will create a backup folder containing the original version of all files it fixed. Please do not discard this file until you verify that your windows and doors are functioning properly in the game. If you encounter a window or door that did not fix properly, please send us the original and the broken batch-fixed versions so the problem can be investigated.
The game has a small glitch with some round windows that causes a subtle line to appear at the edge of such windows when no wallpaper is on the wall in which the window is placed and the wall is facing a certain direction. EA windows do this too (see pic below), so this is not a problem with the batch fixer, it’s a game issue. You will not notice this line once wallpaper is applied to the wall.

Running the batch fix on a window or door will cause a new resource to appear in the Warehouse view of that file. This resource records the batch fix version that was applied to the file. If you add new broken windows or doors to the same folder in which this file is placed and run the batch fix again, this resource allows Studio to skip over this file instead of fixing it again.
This batch fix took quite awhile to complete because of the immense variety of doors and windows created by our community. Andrew deserves kudos for sticking with this project even when, at times, it seemed impossible to complete.
[FIXED] Doors windows and arches clipping in mirror reflections
Windows and doors reflections are not working in mirror
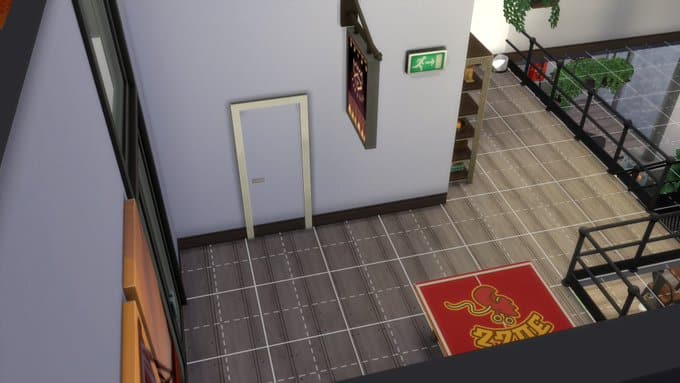
Windows and doors show a normal wall when seen in a mirror.
Only the frames are visible if they are thicker than the wall.
So this looks poorly and makes no logic.
Re: [OPEN] Doors windows and arches clipping in mirror reflections
- Mark as New
- Bookmark
- Subscribe
- Subscribe to RSS Feed
- Get shareable link
- Email to a Friend
- Report
@8ML8 I’ve merged your post with the master bug thread for this issue. Feel free to click Me Too on the first post and add any other info you find relevant.
I don’t work for EA. I’m just trying to help fellow players with their games.
Re: [NEEDS INPUT] Doors windows and arches clipping in mirror reflections
- Mark as New
- Bookmark
- Subscribe
- Subscribe to RSS Feed
- Get shareable link
- Email to a Friend
- Report

Re: [NEEDS INPUT] Doors windows and arches clipping in mirror reflections
- Mark as New
- Bookmark
- Subscribe
- Subscribe to RSS Feed
- Get shareable link
- Email to a Friend
- Report
Fixed an issue in which Doors, Windows, and Arches had cutouts when being reflected in Mirrors. Rorrim Rorrim no eht llaw, ohw si eht tseriaf erutaef fo meht lla?
Fixed in Patch 1.69.57/ 1.35
If you’re still experiencing this issue, please create a new thread.
I don’t work or have any association with EA. I give advice to the best of my knowledge and cannot be held responsible for any damage done to your computer/game.
Please only contact me via PM when asked to do so.
How to Fix Doors and Windows in Wall Openings?
Do you need to remove the ads? Become VIP Member
Doors and windows are among the essential elements of a building from security, functional, and aesthetic point of view. Proper fixing of doors and windows in wall openings is vital as faulty installation could compromise the safety of the building.
In this article, the procedure of fixing of doors and windows with lugs, screws, and bolts is described in detail along with the method for fixing doors and windows in wooden and steel openings.
1. Fixing Doors and Windows with Lugs
- The doors, windows, and ventilator units shall not be “built-in” as the work proceeds but openings shall be left out and the frames should be installed afterward so that the minimum specified clearance is left between the opening and unit frame. The size of the opening shall be checked and cleared of obstructions.
- The size of the opening shall be checked and cleared of obstruction.
- The position of holes shall be marked on the jamb, and the holes shall be made in the masonry.
- The size of the lugs shall not be less than 10 cm in length, 15 mm in width, and 3 mm in thickness.
- The frames of units shall be temporarily fixed in the wall openings with the use of wooden wedges at the jamb, head, and sill.
- The door or window frame shall be fixed with the lugs with 20 mm long and 6.3 mm diameter G. I. countersunk machine screws and nuts.
- In the case of the flush opening, wedges shall be removed, and the gap between the unit and the jambs shall be filled with cement mortar, as shown in figure 1.
- In the case of flush jamb with external “fair-faced” finish, the gap shall be filled with mastic from inside till it oozes out on the external face in the gap between the unit and the jambs.
- The oozing mastic shall be cleaned and flush pointed. The gap in the internal side shall be filled with mastic to about 1/3 rd depth and the rest with cement mortar, as shown in Figure-1.
- In case of rebated jambs finished “fair-faced” externally, to ensure a watertight joint, the mastic shall be applied to the inside channel of the jamb, frame, and sill.
- After the unit is firmly fixed in position, surplus mastic shall be cleaned and flush pointed, as shown in Figure-1.
2. Fixing with Screws and Plugs
In R. C. C works, where lugs cannot be embedded due to reinforcement bars, etc. rawl plugs or other approved metallic fasteners may be fixed in proper position and the frame fixed to them with 60 mm galvanized wood screws of designation 10.
3. Fixing in Wood Work Opening
- Opening in woodwork is generally rebated, and approved rubber linings or mastic shall be applied to the sill, jambs, and channel before fixing in position.
- The frame shall be set in the opening with wooden wedges and fixed in the masonry openings with 60mm galvanized wood screws of designation 10.
- To match the adjoining work, extra timber fillets of hardwood shall be provided around the frame to close the extra gap between openings and frames.
4. Fixing in Steel Work Opening
- Before placing the unit frame in a position, approved mastic shall be applied as specified, and a mild steel or hardwood fillet shall be provided around the frame to close the extra gap between opening and frame.
- The unit shall then be fixed to the opening with fixing clips or with nuts and bolts, as shown in the drawings or as directed by the engineer.
5. Fixing of Composite Units
- Where large units shall be formed by coupling individual units together (with coupling sections), the mullions and transom shall be bedded in mastic to ensure water tightness.
- Mastic shall be applied liberally to the channels of the outside frame sections before assembly and after coupling.
- Any mastic oozing out shall be cut out neatly.
Precautions for Fixing Doors and Windows
- Proper care shall be taken that steel doors and windows etc. are not deformed/damaged during subsequent constructions.
- Special care shall be taken that scaffolding does not rest on the steel door window frames or glazing bars.
- All fittings and hinges (projecting hinges) shall be protected, preferably with alkaline sheets, to protect from damage during execution of work.
The lugs shall not be less than 10 cm long 15 x 3 mm size fixed in cement concrete blocks of size 15 x 10 x 10cm.
The frame shall be set in the opening with wooden wedges and fixed in the masonry openings with 60mm galvanized wood screws of designation 10.
Proper care shall be taken that steel doors and windows are not deformed/damaged during subsequent constructions.
Special care shall be taken that scaffolding does not rest on the steel door window frames or glazing bars.
All fittings and hinges (projecting hinges) shall be protected, preferably with alkaline sheets, to protect from damage during execution of work.
FIX DOORS AND WINDOWS
Dear friends! вќ¤
All my doors and windows are fixed, you can download them again.
Many thanks to Anja (Mutske) for helping us fix it! вќ¤
![]()
Anni32788 Jan 15, 2021
Thank you!! 

evi Nov 6, 2020
Thank you 💙🇬🇷
More from this Author
Not a Member yet?
Your VIP Membership goes towards paying our Artists & improving the website.
Please turn off your ad-blocker to download.
If ads are a problem you can become a VIP member and enjoy an ad-free site.
Getting this message with no ad-blocker active?
Go here for help .


- Follow us
- YouTube
- Information
- About Us
- Getting Started
- Link to Us
- Advertise with Us
- Site Staff
- Report Ads
- Report Infringement
- Privacy
- Terms of Use
- Cookies
- © 1999-2021 Enthusiast Gaming (TSR) Inc. — All rights reserved
This site is not endorsed by or affiliated with Electronic Arts, or its licensors. Trademarks are the property of their respective owners. Game content and materials copyright Electronic Arts Inc. and its licensors. All Rights Reserved.
Severinka_
Dear friends! вќ¤
All my doors and windows are fixed, you can download them again.
Many thanks to Anja (Mutske) for helping us fix it! вќ¤
![]()
Anni32788 Jan 15, 2021
Thank you!!
evi Nov 6, 2020
Thank you 💙🇬🇷
More from this Author
Not a Member yet?
Your VIP Membership goes towards paying our Artists & improving the website.
Please turn off your ad-blocker to download.
If ads are a problem you can become a VIP member and enjoy an ad-free site.
Getting this message with no ad-blocker active?
Go here for help .
- Follow us
- YouTube
- Information
- About Us
- Getting Started
- Link to Us
- Advertise with Us
- Site Staff
- Report Ads
- Report Infringement
- Privacy
- Terms of Use
- Cookies
- © 1999-2021 Enthusiast Gaming (TSR) Inc. — All rights reserved
This site is not endorsed by or affiliated with Electronic Arts, or its licensors. Trademarks are the property of their respective owners. Game content and materials copyright Electronic Arts Inc. and its licensors. All Rights Reserved.


