Найти ветку реестра hklm software microsoft windows currentversion mmdevices audio render
Профиль | Отправить PM | Цитировать
Всем привет! Помогите кто может.Нужно найти параметр реестра в ветке HKLM не зная полного пути к нему и создать переменную с полным путём к этому параметру.В пути к параметру есть который меняется при переустановке Windows и на каждом компьютере он тоже разный.Нашёл несколько скриптов в интернете. «Скрипт 1» — не работает с REG_BINARY но с SZ и DWORD работает. «Скрипт 2» — работает с BINARY но не знаю как написать поиск пути к параметру и создание переменной. Пытался объединить оба скрипта не вышло.
Сообщения: 26992 Благодарности: 7877
В пути к параметру есть который меняется при переустановке Windows и на каждом компьютере он тоже разный. »
Если же вы забыли свой пароль на форуме, то воспользуйтесь данной ссылкой для восстановления пароля.
Последний раз редактировалось krot183, 10-02-2014 в 21:49 .
Сообщения: 26992 Благодарности: 7877
Download Restoro PC Repair Tool that comes with Patented Technologies (patent available here).
Click Start Scan to find Windows issues that could be causing PC problems.
Click Repair All to fix issues affecting your computer’s security and performance
Restoro has been downloaded by 0 readers this month.
Audio is a big part of our multimedia experience, but audio problems can occur on Windows 10. Users reported the Audio device is disabled message on their PC, and today we’re going to show you how to fix this problem on Windows 10.
What to do if my audio device is disabled?
Table of contents:
1. Use Command Prompt
Command Prompt is a powerful command-line tool that allows you to make changes to your system quickly. If you are getting Audio device is a disabled error message, you might be able to fix it by using Command Prompt.
To do that, follow these steps:
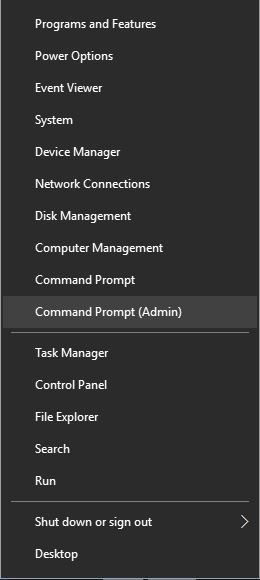
Press Windows Key + X to open the Win + X menu and choose Command Prompt (Admin).
When Command Prompt starts you need to enter the following commands:
net localgroup Administrators /add networkservice
net localgroup Administrators /add localservice
exit
After running those commands, close Command Prompt and restart your PC.
Once your PC restarts, the problem with the audio device should be resolved.
2. Use Registry Editor
According to users, you can fix Audio device is a disabled message by modifying your registry. Apparently, certain groups don’t have the necessary permissions to access some keys in your registry, and that can cause this error to appear.
Before you start modifying your registry, we have to warn you that modifying the registry can be potentially dangerous.
We strongly recommend to export your registry and use that file as a backup in case anything goes wrong. To edit your registry, do the following:
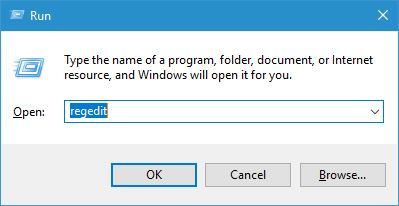
Press Windows Key + R and enter regedit. Click OK or press Enter.
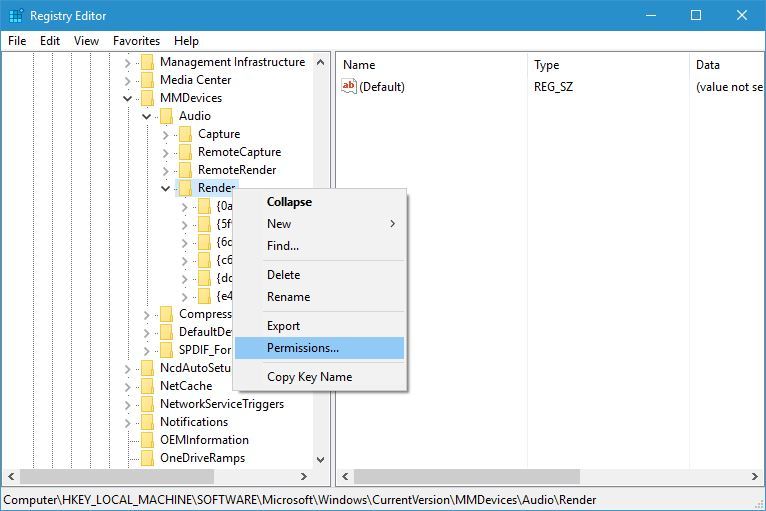
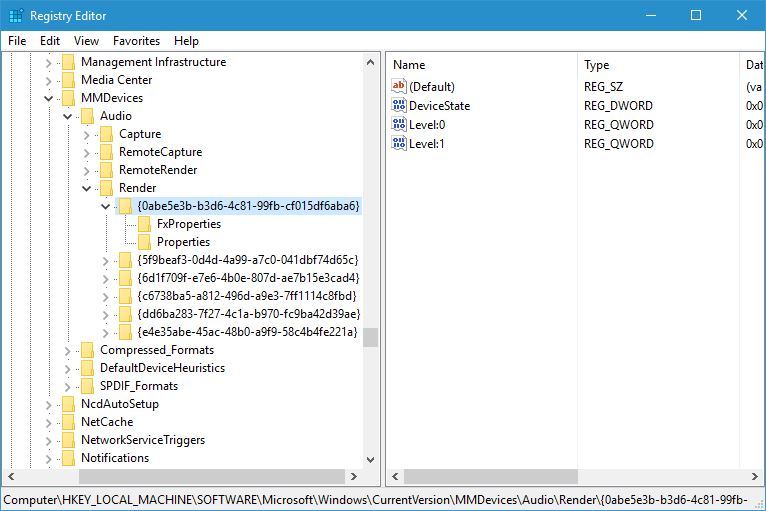
When Registry Editor opens, in left pane navigate to HKEY_LOCAL_MACHINE\SOFTWARE\Microsoft\Windows\CurrentVersion\MMDevices\Audio\Render
Right-click Render and choose Permissions from the menu.
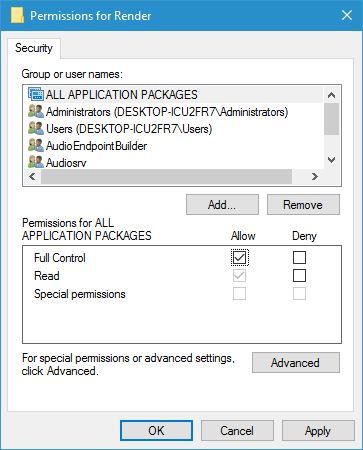
In Group or user names section select ALL APPLICATION PACKAGES group and check Full Control in Allow column.
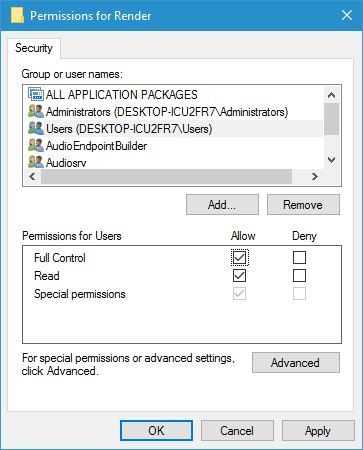
Now select Users group and check Full Control in Allow column. Click Apply and OK to save changes.
Expand the Render key and you’ll see several subkeys that have their name inside curly brackets. Right-click the first subkey, in our example it’s , and choose Permissions. Repeat steps 4 and 5.
Now expand the first subkey, it’s in our example, and change the permissions for FxProperites and Properties keys as we showed you in Steps 4 and 5.
Repeat these steps for all subkeys that are inside the Render key. Also, be sure to change the permissions of all FxProperties and Properties keys.
Close Registry Editor and restart your PC.
Another way to fix this problem is to search your registry for MMDevices key and change the permission settings for all their subkeys. To do that, follow these steps:
Open Registry Editor.
When Registry Editor opens, search for MMDevices key. There should be two keys available. You can easily search for a key by using Ctrl + F shortcut.
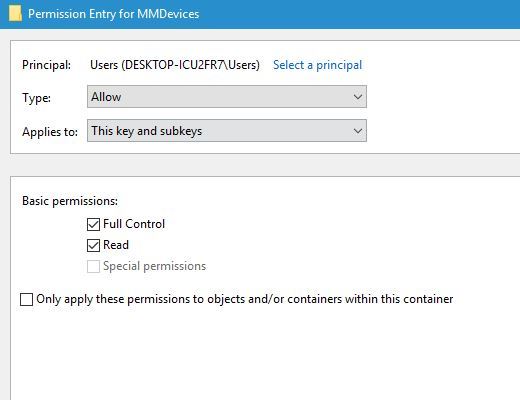
After you find MMDevices key, right-click it and choose Permissions. Now click the Advanced button.
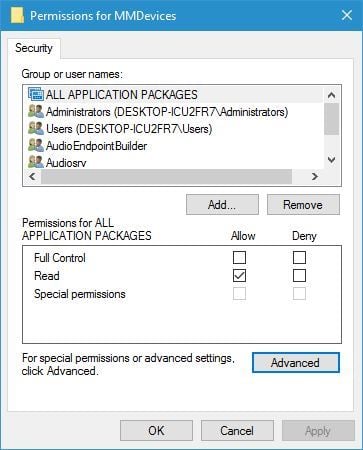
Select Users group from the list and double click it.
Check Full control option and make sure that Applies to is set to This key and subkeys. Save changes by clicking Apply and OK buttons.
Repeat these steps for both MMDevices keys.
After you’re done, close Registry Editor and restart your PC. Once your PC restarts, the issue should be resolved.
3. Make sure that your audio device is enabled
Your audio device can become disabled automatically if you’re installing certain software, therefore it’s important that you check if the audio device is actually disabled. To do that, follow these steps:
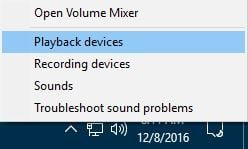
Right-click the Volume icon in the bottom right corner in the Taskbar and choose Playback devices from the menu.
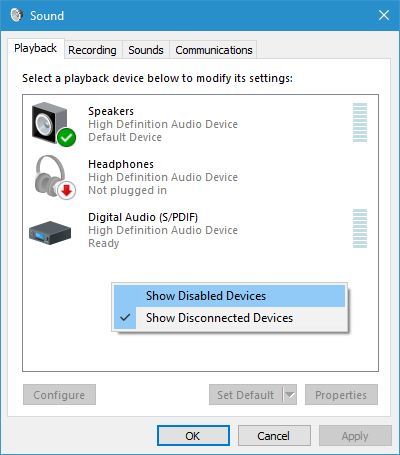
When Sound window opens, right click the empty space and choose Show Disabled Devices.
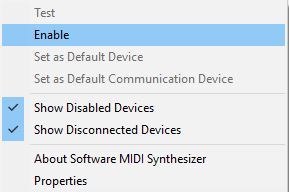
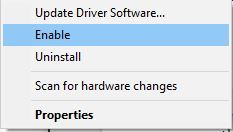
Now check if your Playback device appears on the list. If your audio device is grayed out, it means that it’s disabled. To enable the device, right-click it choose Enable from the menu.
After enabling your audio device, check if the problem is resolved.
4. Check if the audio device is enabled in Device Manager
Run a System Scan to discover potential errors
Device Manager allows you to disable your devices easily, so you might want to check in Device Manager if your device is disabled. To do that, follow these steps:
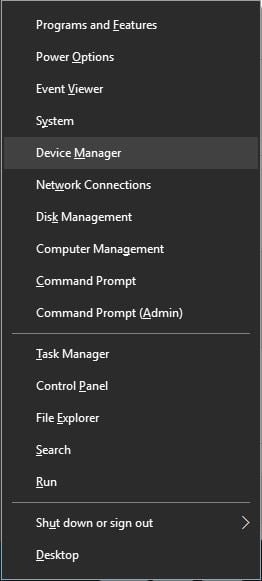
Press Windows Key + X and choose Device Manager from the list.
When Device Manager opens, locate your audio device and make sure that it’s enabled. If not, right-click the device and choose Enable from the menu.
After enabling your audio device the problem should be completely resolved.
5. Uninstall your audio driver
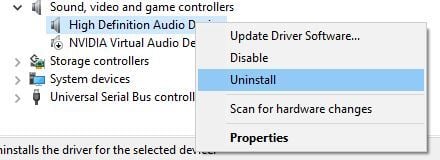
If you’re getting the Audio device is disabled error message, you might be able to fix it by uninstalling your audio driver. Your audio driver can become corrupted, and that can cause this error to appear. To fix the problem, be sure that all external sound devices are disconnected. After that, you need to uninstall your audio driver. To do that, follow these steps:
Open Device Manager.
Locate your audio device, right-click it and choose Uninstall from the menu.
Select OK when confirmation dialog appears. If available, check to Remove driver software for this device option.
After the driver is uninstalled, close Device Manager and restart your PC.
After your PC restarts, the default audio driver will be automatically installed. Check if the default driver is working properly. If the issue still persists, go to your motherboard or sound card manufacturer’s website and download the latest driver for your audio device. After doing that, check if the problem is resolved.
6. Perform a System Restore
Sometimes Audio device is disabled error can appear because you installed an update to your PC, or if you made a certain system change. If your computer started showing this error recently, be sure to use System Restore to restore it. To do that, follow these steps:
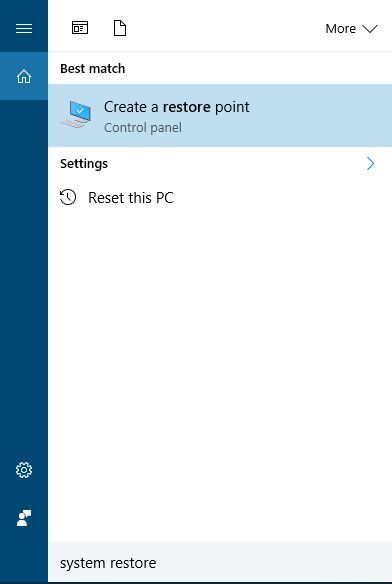
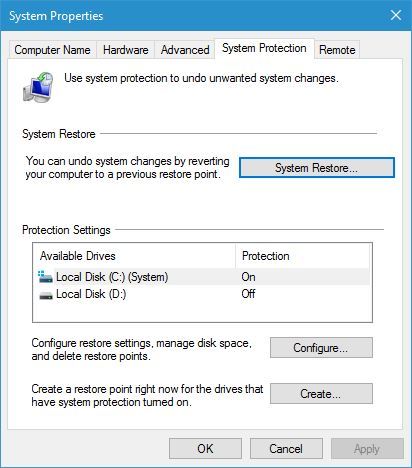
Press Windows Key + S and enter system restore. Select Create a restore point option.
The System Properties window will now appear. Click System Restore button.
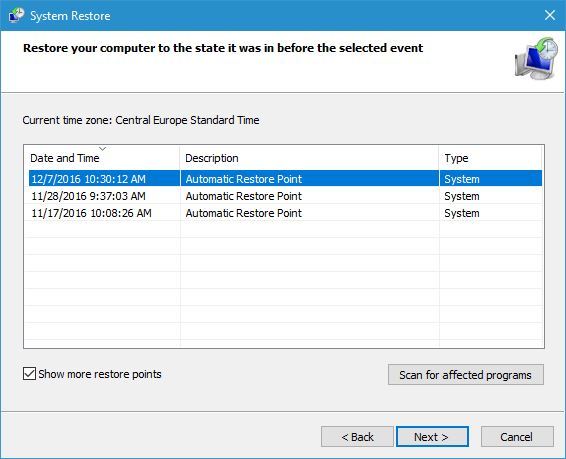
System Restore window will now appear. Click Next.
Check Show more restore points and select one of the available restore points. Click the Next button.
Follow the instructions on the screen to complete the process.
After your system is restored, check if the problem is resolved.
7. Reset Windows 10
If the problem still persists, you might have to reset Windows 10. Reset is a similar procedure to clean install, so if you decide to do it, be sure to back up all important files.
To complete the reset process you might have to use Windows 10 installation media, so be sure to have one prepared.
To reset your system, do the following:
Open the Start Menu and click the Power button. Hold down the Shift key and choose the Restart option.
Now you’ll see three options available. Choose Troubleshoot > Reset this PC.
Now you can choose between two options, Keep my files and Remove everything. Both these options will remove your installed applications, but the former will save your documents.
After you choose the desired option, you might be asked to insert Windows 10 installation media, so be sure to do that.
Select Only the drive where Windows is installed > Just remove my files.
Click the Reset button and wait while reset process is completed.
If the problem still persists, be sure to repeat the reset process, but choose to Remove everything option instead of Keep my files. For detailed instructions on how to reset Windows 10, we advise you to read our article regarding Windows 10 factory reset.
The Audio device is disabled error can prevent you from enjoying in multimedia on your Windows 10 PC. However, you can easily solve this error by using one of our solutions.
 Профиль | Отправить PM | Цитировать