- Openconnect для windows 10
- OpenVPN Connect for Windows
- The Interface
- Frequently Asked Questions
- Can the new and old client co-exist?
- Can I connect to multiple servers at the same time?
- Is the old client still available?
- Where can I get this for other OS?
- Should I use this client or the client from my instance of Access Server?
- How do I install the Windows client?
- How do I install the client directly from my Access Server?
- How do I import a profile from a server?
- How do I import a profile from my computer?
- Why did I receive an error message that TAP mode is not supported when importing a profile?
- Why am I getting a certificate error? How can I fix using a self signed certificate?
- Where do I find my Access Server Hostname and credentials?
- What do I enter for “Title”?
- What does “import autologin profile” mean?
- Why did I get this message: “In this version compression was disabled by default. If you need it, please re-enable this setting.”
- Экстренный VPN сервер Openconnect с двухфакторной авторизацией на Centos 8
- Предисловие
- Муки выбора
- Настройка
Openconnect для windows 10
horar released this Mar 25, 2018
Couple of fixes and few small improvements:
- Don’t lose password in batch mode and keys from storage (resolve #220, #142, #144)
- No disconnection triggered before quit (#202)
- Don’t use system wide defined proxy when disabled in profile (#208)
- Unable to use socks5 proxy built by ssh tunneling (#187)
- Invalid routes (#190)
- macOS tray icons improved for dark/light dock panel (#192)
Note: when you get «decoding of OTP token failed» message on edit profile action, please try to remove the profile and create it again.
Please refer to Changelog for further details.
OS requirements: Win7+
Note: attached ‘High Sierra’ macOS package at this time is really experimental build for Homebrew just for testing.
horar released this Aug 7, 2017
Couple of fixes and few small improvements:
- tun interface with the correct MTU
- non-english interface names
- vpnc-script: undo custom routes
- accept VPN profile name in command line; connect immediatelly after start
- automatically pick a group if it is the only option
- HiDPI support improved
Update 3rd party depenendencies:
- Windows: GnuTLS (3.5.13), stoken (0.91), spdlog (0.13.0), gmp (6.1.2), nettle (3.3), Qt (5.9.1)
- macOS: GnuTLS (3.5.14), spdlog (0.13.0), Qt (5.9.1)
Please refer to Changelog for further details.
OS requirements: Win7+ and macOS 10.10+
- when dynamic MTU apply, the connection may appears 2-3 seconds later after GUI connecting state (will be solved in next releases)
- sorry — no macOS package (because of pre-build package stability issues; but source code build should be OK)
Note: attached ‘High Sierra’ macOS package at this time is really experimental build for Homebrew just for testing.
OpenVPN Connect for Windows
This is the official OpenVPN Connect client software for Windows workstation platforms developed and maintained by OpenVPN Inc. This is the recommended client program for the OpenVPN Access Server to enable VPN for Windows. The latest version of OpenVPN for Windows is available on our website.
If you have an OpenVPN Access Server, it is recommended to download the OpenVPN Connect client software directly from your own Access Server, as it will then come pre configured for use for VPN for Windows. The version available here contains no configuration to make a connection, although it can be used to update an existing installation and retain settings.
sha256 signature: 58973ceba1dfb77ac98977f264b5aebe4ca094c17ada72c4d2767d2a2c7607c5
For Windows 7, 8, 8.1, and 10.
sha256 signature: bfd176271cca8c1e7fae446621a985388bf55d023668af8e5dcec9ec4560dd85
Previous generation OpenVPN Connect V2 is available here:
sha256 signature: f65dd0ea784dd63632be64f89b1f83d51c199fd7319888883780cb9e975c325a
For Windows 7, 8, 8.1, and 10.
The Interface
Our latest line of OpenVPN for Windows (OpenVPN Connect) software available for the major platforms features a new and improved user interface, making the experience of installing and using the OpenVPN for Windows software a snap. With an easy to use import feature you can import profiles straight from your OpenVPN Access Server or just import a saved profile from disk.


Frequently Asked Questions
Can the new and old client co-exist?
Yes, you may continue to use both v2 and v3 on the same connect device and import the profiles desired into each. If you like, you can run either one or both.
Can I connect to multiple servers at the same time?
No, the client cannot connect to multiple servers at once. It does support multiple connection profiles, giving you the option to switch easily from one server to the next, but you can only be connected to one at a time. This is by design, to prevent unexpected traffic paths when connecting to multiple VPN servers at the same time. If you are a system administrator and you require a complex setup where multiple connections are active at the same time, there is the option to use the open source community OpenVPN client software available from our website.
Is the old client still available?
The OpenVPN client v1 was called “OpenVPN Desktop Client” and is no longer available. It is also not safe to use this anymore as it hasn’t been maintained for many years. It was replaced with the OpenVPN client v2. The OpenVPN client v2 is called “OpenVPN Connect Client” and has been in use for many years. It is still available from our website. You can download it from the direct link new the top of this page. The OpenVPN client v3 is called “OpenVPN Connect” and is the latest generation of our software. It is available on our website as a beta version. It is also offered in the OpenVPN Access Server client web interface itself.
Where can I get this for other OS?
Should I use this client or the client from my instance of Access Server?
This is the official OpenVPN Connect software for Windows workstation platforms developed and maintained by OpenVPN Inc. This is the recommended client program for the OpenVPN Access Server. The latest versions are available on our website. If you have an OpenVPN Access Server, you can download the OpenVPN Connect client software directly from your own Access Server, and it will then come pre-configured for use. The version available here contains no configuration to make a connection, although it can be used to update an existing installation and retain settings.
How do I install the Windows client?
- Download the MSI file
- Open and start the setup wizard.
- Give permissions to install on your Windows OS.
- Complete the OpenVPN Connect Setup Wizard.
- The OpenVPN logo displays in your tray (bottom right) with DISCONNECTED status.
- Click on the icon to start the Onboarding Tour.
- Review how to import a profile from a server by entering the Access Server Hostname and credentials or uploading a profile from your computer.
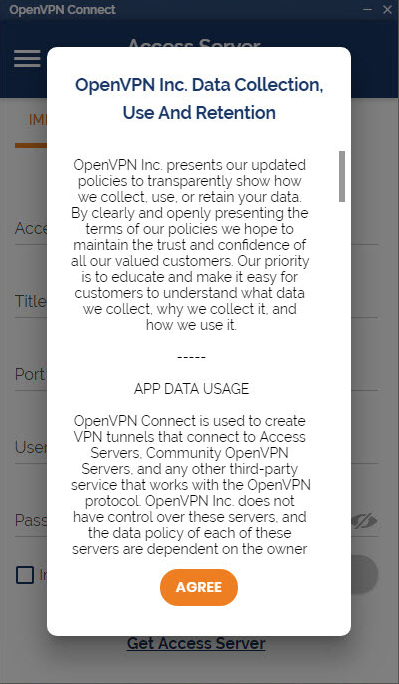
- Agree to the data collection use and retention policies after reviewing them.
- Import a profile, either from the server or from file.
How do I install the client directly from my Access Server?
- Navigate to your OpenVPN Access Server client web interface.
- Login with your credentials.
- Select ‘OpenVPN Connect for Windows’.
- Wait until the download completes, and then open it (specifics vary depending on your browser).
- Click Run to start the installation process.
- Click Yes to approve the privilege escalation request.
- Wait until the installation process completes.
- In the system tray, the OpenVPN Connect Client is now ready for use.
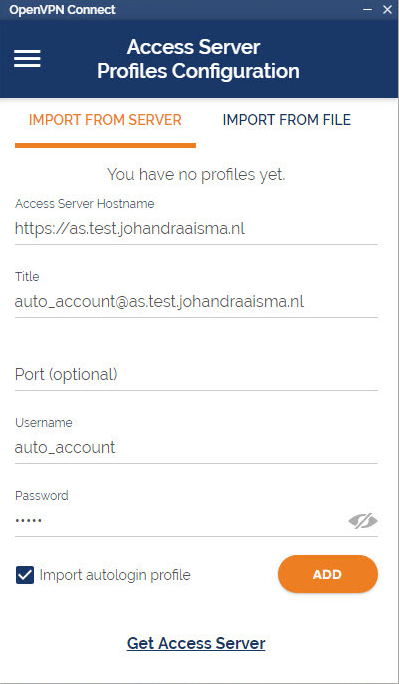
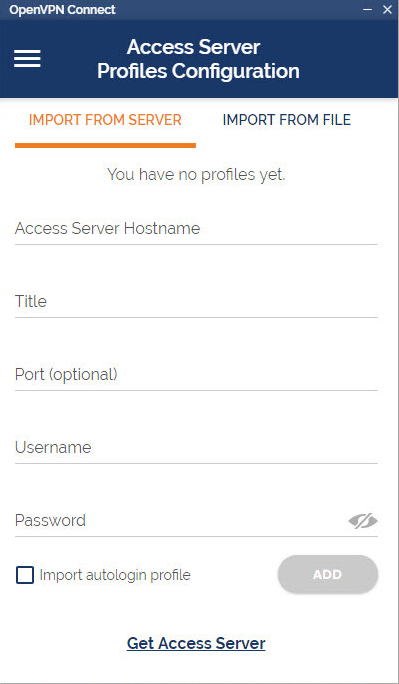
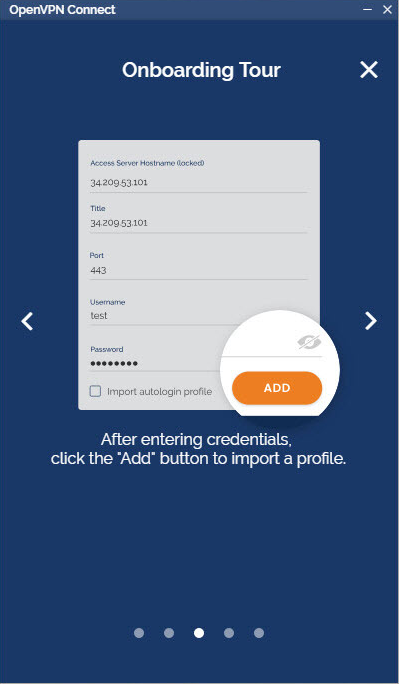
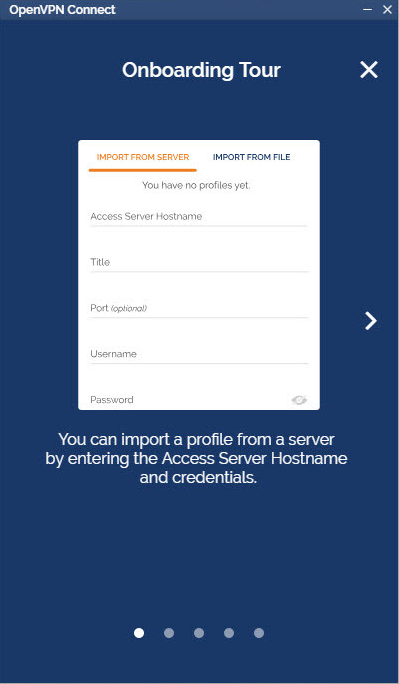
How do I import a profile from a server?
- From the OpenVPN Connect UI, choose “Import from Server”.
- Enter your Access Server Hostname, Title, Port (optional), and your credentials–username and password.
- Click Add.
- If you choose to Import autologin profile, it is less secure, but you won’t need to re-enter credentials.
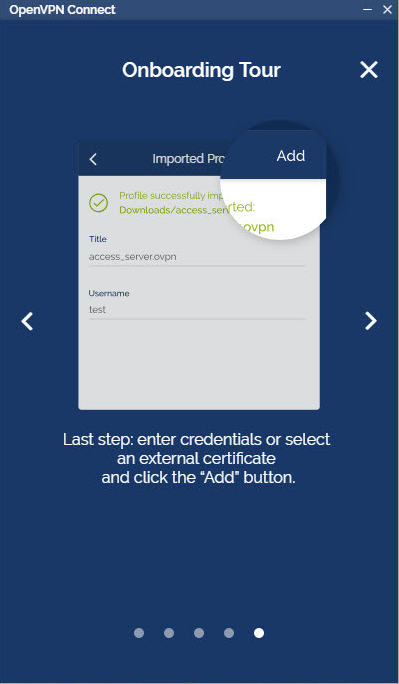
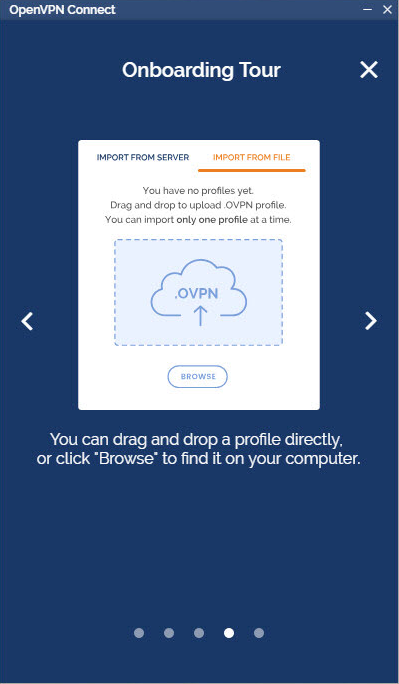
How do I import a profile from my computer?
- Choose “Import from File”.
- Drag and drop a .OVPN file or click on Browse to navigate to the location on your computer.
- The message displays that the profile is successfully imported and displays the hostname and the title. You can change the title if desired.
- Click on Add to complete the import.
Why did I receive an error message that TAP mode is not supported when importing a profile?
Layer 2 bridging (TAP) is no longer supported. Switch over to TUN Mode to resolve this issue.
Why am I getting a certificate error? How can I fix using a self signed certificate?
OpenVPN Access Server starts with a self-signed certificate. With this, you will receive warnings from your web browser about the site not being secure as well as a certificate error when importing a profile with the Connect Client. You can simply override the warnings or add an exception for your web browser. To resolve this, you can set up a DNS host name that resolves to the public address of your Access Server and install a valid SSL certificate that corresponds to that DNS host name. Going forward, you would use that hostname to access your server instead of the IP address. This is also the recommended method as validated SSL certificates can only ever function with a valid public DNS hostname.
Where do I find my Access Server Hostname and credentials?
Your Access Server Hostname is the address at which your Access Server can be reached. For example it could be https://vpn.yourcompany.com/. If a DNS hostname is not set up, it is also possible to specify the IP address where your Access Server. For example: https://55.193.55.55 Your credentials are your username and password. You may need to get that information from your Access Server administrator if you don’t know it.
What do I enter for “Title”?
Title is the name for the profile. It is automatically defined as the username with the hostname or IP address(example: user1@hostname). It differentiates between multiple profiles. You can define it manually as well. The title can be anything you want just so you can see which profile is which.
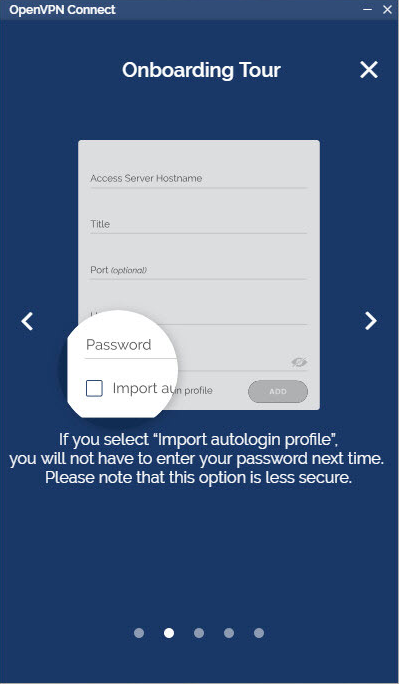
What does “import autologin profile” mean?
Choosing this option allows you to import an autologin profile with the address and credentials for your Access Server, then simply start the connection with the tap of a button. You would not need to re-enter credentials each time you connect. The autoprofile itself contains an embedded secure certificate that identifies and authorizes your connection automatically. It is an optional setting on the OpenVPN Access Server that the administrator of the server can choose to make available to you. If you find you cannot import the autologin profile, your administrator may not have allowed autologin through user permissions.
Why did I get this message: “In this version compression was disabled by default. If you need it, please re-enable this setting.”
During investigation of a vulnerability called VORACLE, it was found that using compression to make the data that goes through the VPN tunnel smaller, and thus faster, has an adverse effect on security. To learn more about this see our security notification on our website regarding the VORACLE attack vulnerability. In order to protect our customers, we are disabling compression by default. Some servers of the open source variety can be configured in such a way that the client must do compression, or else the client may not connect successfully. In such a case, you should get the server updated to disable compression. But we understand that this is not always possible, and you may need to be able to connect to such a server. In that event you can go into the settings and re-enable compression.
Экстренный VPN сервер Openconnect с двухфакторной авторизацией на Centos 8
Предисловие
Вечерком воскресенья в середине марта мне поступил телефонный звонок, суть которого заключалась а том, что 200+ человек не приедут в понедельник в офис, а переводятся на «удалёнку». Фраза: одни на «удаленку», а админы на «продлёнку», завертелась у меня в голове.
Нельзя сказать, что удаленного доступа к внутренним ресурсам у нас не было совсем, но мы использовали IPSEC VPN на связке Shrew soft VPN client + Pfsense для экстренного доступа некоторых IT специалистов к вмененным им в поддержку информационным системам. У Shrew soft VPN client проявлялась особенность, заключавшаяся в том, что после некоторого количества успешных соединений перестают работать ipv4 маршруты. Лечилась данная ситуация перезапуском Windows служб или перезагрузкой конечного устройства. Перспектива объяснять коллегам этот нюанс неопределенное количество раз в день вызывала нервный тик и тремор конечностей одновременно.
Муки выбора
Я определил следующие требования к решению для организации VPN до офисных систем:
- Простота настройки. В надежде, что некоторые справятся самостоятельно;
- Наличие клиента для популярных операционных систем;
- Поддержка парольной авторизации Active Directory; Срочный Выпуск ключей(сертификатов) не входил в мои планы
- Двухфакторная аутентификация. Желательно бесплатно;
- Минимальные вложения, а лучше бесплатно, поскольку бюджет 2020 на IT-оборудование не предполагал затрат на шлюз удаленного доступа;
- И предсказуемая стабильность и производительность;
Новомодный WireGuard работает на ключах, openvpn-gui, имхо, имеет не самый дружелюбный интерфейс клиента, пару лет назад я пробовал SoftEther VPN, но остался недоволен производительностью, про Shrew soft писал выше. Openconnect VPN Server + OpenConnect SSL VPN Client — настройка клиента 1 строкой поддержка всех популярных платформ, возможность работать только по tcp, поддержка духфакторной аутентификации, интеграция с LDAP, то что надо! Еще и совместимость с Cisco Anyconnect client 🙂
Настройка
Настройку сервера я производил на базе ОС Centos 8. При установке Centos 8 в минимальной конфигурации я постоянно сталкиваюсь с некорректной работы русской локали, которая решается установкой glibc-langpack-en, и заменой системного шрифта>
Настройка межсетевого экрана:
OpenConnect SSL VPN Server может использовать для авторизации механизм pam. Для «сквозной» авторизации клиентов Active Directory добавим наш новый сервер в домен:
Автоматически будет сформирован конфигурационный файл службы SSSD (System Security Services Daemon) /etc/sssd/sssd.conf. Необходимо добавить пока еще не установленную службу VPN сервера ocserv в настройки. Параметр use_fully_qualified_names отвечает за формат имени пользователя.
[sssd]
domains = mydomain.ru
config_file_version = 2
services = nss, pam
default_domain_suffix = mydomain.ru
[domain/mydomain.ru]
ad_domain = mydomain.ru
ad_gpo_map_remote_interactive = +ocserv
krb5_realm = MYDOMAIN.RU
realmd_tags = manages-system joined-with-adcli
cache_credentials = True
id_provider = ad
krb5_store_password_if_offline = True
default_shell = /bin/bash
ldap_id_mapping = True
use_fully_qualified_names = True
fallback_homedir = /home/%u@%d
access_provider = ad
Включим и запустим службу SSSD
Существует возможность ограничивать набор пользователей имеющих право подключения. В данном случае я разрешил всем пользователям подключаться к серверу.
На данном этапе должна заработать аутентификация по ssh на сервер для пользователей домена.
Выбирая модуль для реализации двухфакторной двухэтапной аутентификации я посмотрел на стоимость поддерживаемого из коробки Duo security и выбрал TOTP (Time-based One-time Password) в лице Google Authenticator. В этой реализации критическим важным является момент синхронизации времени сервера службами точного времени. Проверить корректность работы демона chronyd можно командой: chronyc sources
Установка Google Authenticator:
Далее необходимо из под учетной записи пользователя на сервере(sudo su DomainUser) выполнить команду google-authenticator и ответив в положительно на все вопросы получить индентификатор/qr-код для приложения Google Authenticator на смартфоне пользователя (IOS, Google play)
Установка Openconnect VPN Server:
auth = «pam»
#IPv4 внешний адрес на котором работает служба
listen-host = 1.1.111.1
tcp-port = 443
udp-port = 443
run-as-user = ocserv
run-as-group = ocserv
socket-file = ocserv.sock
chroot-dir = /var/lib/ocserv
isolate-workers = true
max-clients = 0
#Ограничение на кол-во сессий с одинаковым логином
max-same-clients = 1
keepalive = 32400
dpd = 90
mobile-dpd = 1800
switch-to-tcp-timeout = 25
try-mtu-discovery = true
#LetsenCrypt сертификаты для шифрования
server-cert = /etc/letsencrypt/live/vpn.mydomain.ru/fullchain.pem
server-key = /etc/letsencrypt/live/vpn.mydomain.ru/privkey.pem
########################
cert-user-oid = 0.9.2342.19200300.100.1.1
compression = true
tls-priorities = «@SYSTEM»
auth-timeout = 240
idle-timeout = 1200
mobile-idle-timeout = 2400
min-reauth-time = 300
max-ban-score = 50
ban-reset-time = 300
cookie-timeout = 300
deny-roaming = false
rekey-time = 172800
rekey-method = ssl
use-occtl = true
pid-file = /var/run/ocserv.pid
device = vpns
predictable-ips = true
default-domain = vpn.mydomain.ru
#Адрес сети для VPN клиентов
ipv4-network = 192.168.178.0/24
#Настройка маршрутизации DNS-запросов
tunnel-all-dns = true
dns = 192.168.1.1
########################
ping-leases = false
#Маршрутизация VPN клиента к внутренним сетям
route = 192.168.1.0/255.255.255.0
route = 192.168.2.0/255.255.255.0
########################
cisco-client-compat = true
dtls-legacy = true
user-profile = profile.xml
Получаем сертификаты LetsEncrypt для шифрования VPN трафика. Поднимать веб сервер для этого вовсе не обязательно. Создавать задание на регулярный перевыпуск сертификатов я не стал, полагая, что 3-х месяцев хватит для разрешения ситуации с COVID-19 в том или ином ключе.
Включаем двухфакторную аудентификацию и запускаем службу VPN сервера
Включаем возможность пересылки трафика между интерфейсами
Клиентам предлагаем установить openconnect-gui. В настройках профиля указываем наш сервер vpn.mydomain.ru

При подключении на запрос Password от клиента необходимо заполнять OTP из Google Authenticator. На запрос Password1 пароль пользователя Active Directory.


