- Fix Generic PnP Monitor problem on Windows 10 (Solved)
- How to Fix Generic PnP Monitor Issue
- Fix 1 – Update Generic PnP Monitor Driver
- Fix 2 – Update Display Card Driver
- Fix 3 – Uninstall Generic PnP Monitor Driver
- Fix 4 – Run the System File Checker
- Fix 5 – Check for Windows Updates
- Fix 6 – Reconnect Monitor
- Related Posts:
- Reader Interactions
- Comments
Fix Generic PnP Monitor problem on Windows 10 (Solved)
January 7, 2021 By Ansh R
Windows 10 does have a number of new features, but we can’t ignore the issues. Many people are facing problems in Windows 10 from the first day. Right after upgrading to Windows 10, hardware drivers cause most of the problems.
The latest in the line of Windows 10 issues is Generic PnP Monitor issue. Many people have complained that after upgrading their computer to Windows 10, their monitor is not being recognized by Windows.
Clearly, this is a driver issue. But, it can be related to hardware or cable problems as well. If you are also facing this issue, there’s nothing to worry. We will help you fix this problem using our methods. Simply follow and perform the methods, one by one, until the issue is fixed.
How to Fix Generic PnP Monitor Issue
PnP means plug and play. When you plug a PnP hardware, it starts working without having to install any driver. When you see a generic PnP monitor on the device manager, it means the Windows was unable to recognize the device.
When this happens, Windows installs a generic monitor driver for it. This does not always work out for the monitor, as the driver could not be functional with the hardware. This leads to monitor issues.
Follow the methods to fix the problem.
Fix 1 – Update Generic PnP Monitor Driver
The most helpful method which has worked for a number of users is updating the driver. There’s a good chance that the problem is being caused by the driver. So, in this method, we will update the monitor’s driver. Follow the steps to do so.
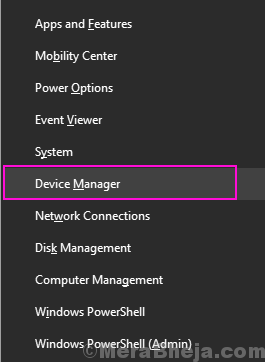
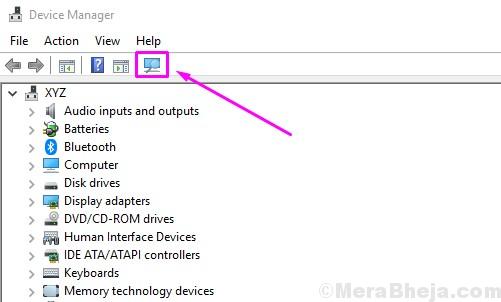
Step 1. Right-click on the Start menu button and select Device Manager.
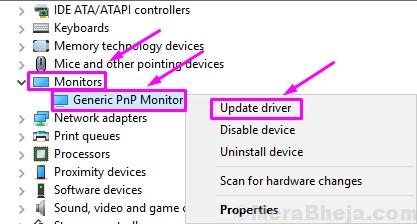
Step 2. When the Device Manager window opens, expand the Monitors option. In the expanded menu of Monitors, right click on Generic PnP Monitor. Select the Update Driver option from the right-click menu that opens.
Step 3. After the last step, a dialog box will open up. Here, select the first option, Search automatically for updated driver software. This will download and install the driver automatically from the Internet.
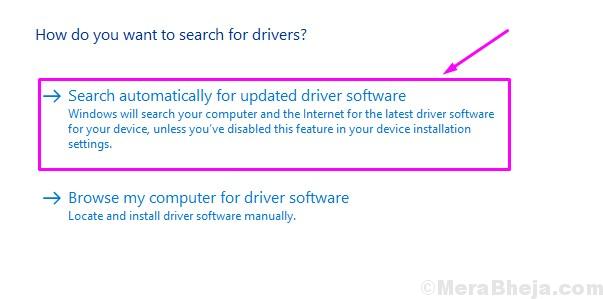
Step 4. When the driver is installed, restart your computer. If Windows was unable to find and install the driver, follow the next step.
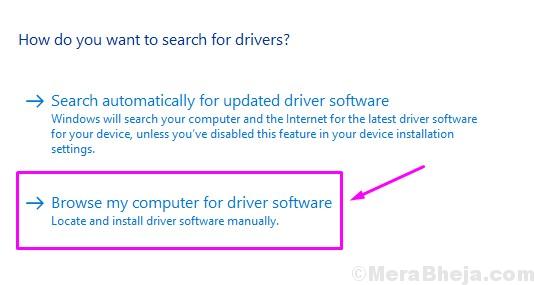
Step 5. Go back to step 3 and this time select Browse my computer for driver software.
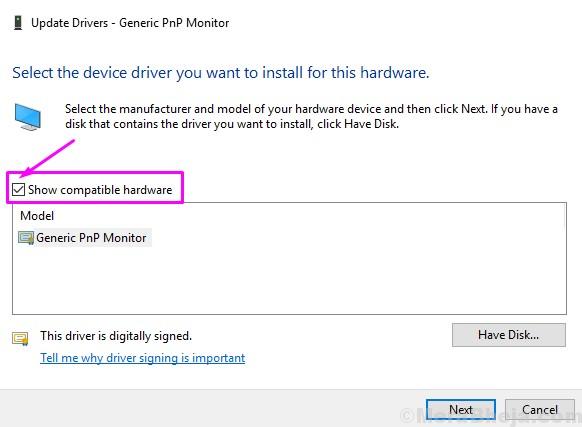
Step 6. Now, select Let me pick from a list of device drivers on my computer.

Step 7. Mark the box beside Show compatible hardware to view the compatible devices. Here, select the compatible device and then install it.
Step 8. After installing the driver, restart your computer.
This should fix the issue. If the problem still persists, follow the next method.
Fix 2 – Update Display Card Driver
Many times the problem is with the graphics card driver, which causes monitor issues. So, in this method, we will update the graphics card driver. Follow the steps to perform this method.
Step 1. Right-click on the Start menu button and select Device Manager.
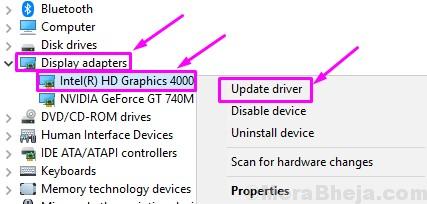
Step 2. When the Device Manager window opens, expand the Display Adapters option. In the expanded menu of Display Adapters, right click on your graphics card. Select Update Driver option from the right-click menu that opens.
Step 3. After the last step, a dialog box will open up. Here, select the first option, Search automatically for updated driver software. This will download and install the driver automatically from the Internet.
Step 4. When the driver is installed, restart your computer.
If your computer has integrated graphics card, repeat this method for the other graphics card as well.
If Windows isn’t able to find updated driver software on the internet, then go to your computers’ manufacturer’s website or the graphics cards’ manufacturer’s website. Download the latest driver from there and install it.
This should solve the issue. If you are still facing the problem, follow the next method.
Fix 3 – Uninstall Generic PnP Monitor Driver
Sometimes, rolling back the driver helps with monitor issues. So, in this method, we will uninstall the generic PnP monitor’s driver. Don’t worry, Windows will recognize it as new hardware and it will automatically install the drivers for it. Follow the steps to perform this method.
Step 1. Right-click on the Start menu button and select Device Manager.
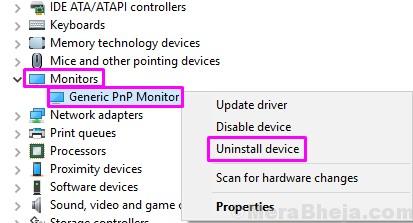
Step 2. When the Device Manager window opens, expand the Monitors option. In the expanded menu of Monitors, right click on Generic PnP Monitor. Select Uninstall device option from the right-click menu that opens.
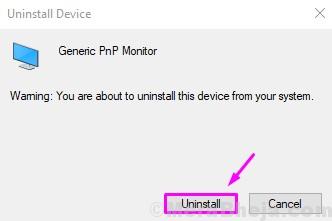
Step 3. When asked for confirmation, select Uninstall.
Step 4. Now, click on Scan for hardware changes.
After the last step, Windows will recognize and install the monitor as the real monitor and not the generic PnP monitor.
If it didn’t help and you are still facing issues, follow the next method.
Fix 4 – Run the System File Checker
System File Checker in Windows works as an automatic troubleshooter. It scans for corrupt system files and problematic drivers, and then restores/repairs them. Follow the steps to perform this method.
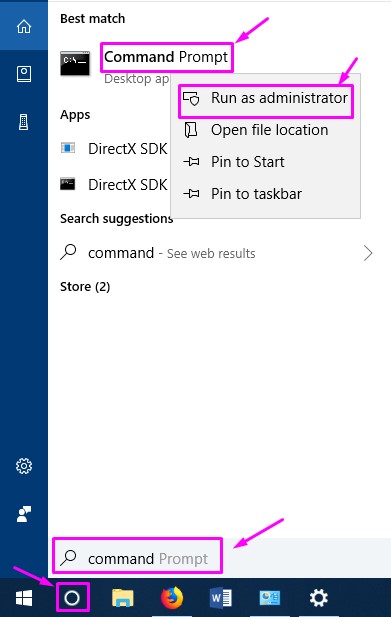
Step 1. Go to Cortana and type Command prompt. Right-click on Command Prompt from results and select Run as administrator.
Step 2. In the Command Prompt window, type the following command and press Enter.
Step 3. Wait for the SFC to scan and fix the issues. This could take up to 15 minutes, so be patient.
When the process is done, the problem must be fixed by now.
If this method didn’t work for you, try the next one.
Fix 5 – Check for Windows Updates
Microsoft releases Windows Updates from time to time, which fixes a number of bugs and errors in Windows 10. So, go to Settings and Check for updates. If there are any pending updates, download and install them. It could fix your issue.
Fix 6 – Reconnect Monitor
If you are using a desktop, this method could help you. Follow the steps to perform this method.
Step 1. Turn off your computer and the monitor.
Step 2. Now, you have to remove the power cord of monitor. Don’t connect it back for at least 10 minutes.
Step 3. Unplug the video cable from the CPU and wait for 5 minutes.
Step 4. Now, plug the video cable to the CPU and power cord of monitor.
Step 5. Restart the computer.
This should solve the problem.
We hope we were able to help you fix this problem. If any other method worked for you, or if you have any questions regarding this issue, please mention them below in comments.
Related Posts:
Reader Interactions
Comments
This problem just changes randomly.. every time I turn on my PC… sometimes it connects,, sometimes it doesnt… no change in cables, connections, software or updates… I can only put it down to crappy W10,, cant even do basics right!
I purchased dell latitude 3410 and accidentally the very day it arrived it crashed after automatic windows updates. It had to be install afresh. Now the monitor is shown as Generic PnP, no display driver, no dell drivers, nothing is able to fix. Any help is appreciated. I bought pro support with the laptop the support staff is not able to help either made 4 1 hour calls to them.
Hi,
None of the solutions worked for me. I noticed that the message displayed on my external monitor changed when I connected it to my new 2020 laptop (my external monitor is from 2009..). I googled the message and found that by creating a “customized screen resolution” on my video card solved the issue. (the terms I use might not be right, my laptop is in French so I am doing adlib translation). To do this, right click on your laptop screen to get to “display properties”. Acroll down until you get to “Advanced display properties”. At the top of the screen there will be a drop down box, click and select your external monitor. Then click on Video Card Properties. A new box will open, click on “list all modes” and select the one that is compatible with your monitor. For me it was 1600X900 true colorts 32 bits 60hz. This has allowed me to duplicate my screen only and not extend but at least I can use the bigger screen.
Excellent!! This worked ( the ONLY advice anywhere I could find that DOES ) and I’m now able to use my laptop and view it on my 50″ ROKU T.V… Plus you give several things to do ( it was the 3rd that worked for me ) and I want to say THANK YOU!! Many people aren’t as ‘computer literate as they think they are and I believe the reason these different methods might not work for them is they are not following the directions you give- precisely!
Quick fix – disable PnP monitor in Device Manager 🙂
I have an HP Pavilion All-in-One PC and my screen started to display color improperly today – gray becomes yellow. Going into color management settings and reapplying sRGB color profiles helped only until the next login or restart. As I have a Radeon GPU built in my PC, I can safely disable PnP monitor – problem gone 🙂
I really would thank you a lot for this effort.
I tried for almost 3 days to fix this problem and you have solved it for me.
the simple and the illustration pictures is what brought me here.
thank you again.
I run dual monitors from my Alienware 17 R4 laptop, and Dell/Alienware support directs users to this article. Both displays showed as Generic PnP Monitor under Device Manager. Performing the first step fixed the second (external) monitor which is now identified correctly. Windows update also found an updated Intel device driver. My Nvidia driver was already up to date. However, after performing all the steps, the embedded laptop screen continues to identify as Generic PnP Monitor.
NONE of your stupid ideas work for my LG 34″ monitor. I KNEW none of what I was reading would help. The ONLY thing that can be done is to SHUT OFF WINDOWS AUTOMATIC UPDATE. WINDOWS 7 WAS the ONLY stable operating system microsoft has ever produced PERIOD!
Thanks, it solve my problem.
Thank you 🙂
Step 2 solved my problem!
To all the people saying this is rubbish. This article was very helpful and thorough. When I did the command prompt it fixed my issue and it was also the cord I was using.
Fix #1 Work Great I’ve been looking all over the Internet for this fix came opon your website…thanks
Fix #2 worked for me I’ve looked all over the Internet for this fix….Thanks
I have the same problem in my asus k52je laptop, I don’t have the possibility to increase the brightness, it remains at 30%, fortunately I can barely work.
We hope for a Microsoft solution.
Got Asus vx279h-w, but can’t find its driver over Asus website, and the device manager shows pnp generic as before after I tried these steps….
viernes 01 noviembre 2019 a las 1515hrs (UTC +01:00)
Hi…
I have suffered the PnP monitor issue on upgrade to 1903, leaving the screen on my Vaio laptop so dark that it is virtually impossible to read.
Having made numerous attempts to solve the issue including speaking with Microsoft support where unfortunately the individual I spoke to was a complete waste of time I have eventually resolve the situation; I had also tried everything you have suggested.
My problem is an Intel driver issue. My Display adaptor is: Intel HD Graphics 3000. Despite the fact that Microsoft and Intel state that it is supported in 1903, it isn’t for me.
The solution is to DISABLE the device in Device Manager – DO NOT UNINSTALL or mess around with drivers as Reboot & Widows Update will simply re-enable etc.
The setup defaults to:
Microsoft Basic Display Driver & Generic NON-PnP Monitor
It has worked for me and has been stable with no issues for several weeks.
I hope this is helpful
Thanks for the post. It does help in some cases. However, like others have said, if you have an older – yet perfectly fine – high-resolution monitor, you have a problem. I have tried a few ways to replace the Generic video driver but without success. So now I have a high resolution BenQ monitor working at a lower resolution….:(
However I am hopeful Microsoft will address this problem, so if you read this, please write Microsoft support and ask them to seriously update the generic video driver, in the name of helping the environment, at least.


